Sweet dreams: Hand-printed pillow cases
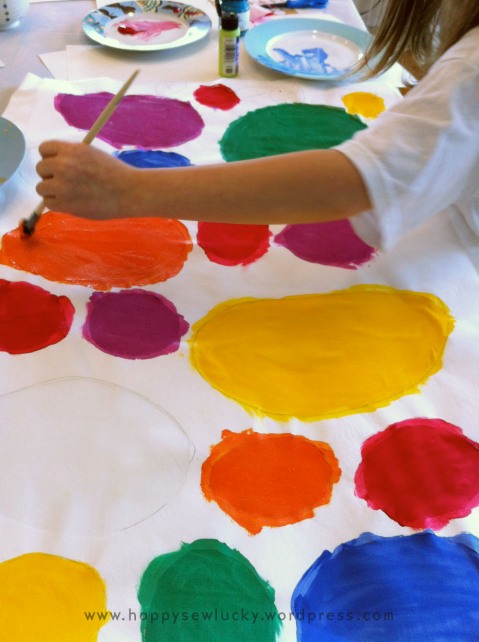
A couple of weeks ago I hosted a couple of Kids Craft Camps while our BC teachers were on strike. The first was for littleez (age 5-8) and our project for the day was to paint a pillow case, which was a great success. This is a great project for kids of pretty much any age five and up.
If you’re inspired to do this project, then here’s what you will need:
White Cotton Pillow Cases (I got ours from Ikea), White Cardboard sheets to put inside the pillow cases, Fabric Paint (I like Jacquard brand), Freezer Paper, Pencils, scissors, an Iron, Stencilling Sponges or make your own with a small piece of sponge duct-taped to the end of a chopsticks – this is what we ended up using. (The spongey tips distributed the ink more evenly than our paintbrushes did, so we abandoned the brushes.)
STEP 1: Cut the cardboard to fit inside your pillow case. This will stop the paint seeping through onto the bottom layer of the pillow case. Cut the freezer paper into a sheet about the same size as your pillow case. This will be your mask / stencil for painting.
STEP 2: Draw your design onto the non-shiny side of the freezer paper. TIP: A simple design works best with this technique, given that you have to cut out everything that is to be inked. i.e.: no fine lines or finicky detail. Also bear in mind that with freezer paper you don’t always get a very crisp edge, especially doing this with kids. So fine detail will be lost. Now cut out your shapes that you’d like to ink. Note that if your colours have white space in-between them, try and keep that white space to a minimum of about a half inch (12mm).
For a bit of bonus fun, I gave the kids each a few sheets of price stickers to stick inside the stencil area. Polka dots galore!
STEP 3: Place your freezer paper onto your pillow case, shiny side down. Carefully iron the freezer paper, taking care not to crease or tear the stencil. After this step take a break for a snack. We had cookies and apples, that didn’t last very long on the plate.
STEP 4: Put a teaspoon of ink onto an old plate and use your sponge ink applicator to apply the ink onto the pillow case. Take care around the stencil edges, but make sure that the ink goes all around the inside space of the cut out shape. (You may have to help the kidlets check this as at this age the concept of stencilling can be confusing when it’s the same colour as the pillow case)
STEP 5: Drying time! If you have sunshine & time on your hands you can let these dry by themselves. We were on a mission, so we used a hair dryer to speed things up.
STEP 6: The big reveal! This is definitely the most fun step. Carefully peel your stencil off. Starting with the polka dot stickers…
STEP 7: Important! Heat seal the ink. Since your pillow case will need to go in the washing machine, you will need to heat seal the inks. Usually this involves ironing without steam, or about 20 minutes on high heat in the dryer. I usually do both to be safe. Check the instructions that come with your inks.
STEP 8: Make your bed and sleep on your work of art!!


Such a great craft idea for kids, will keep this in mind for our next rainy days 🙂
Thanks for sharing!
This project is absolutely wonderful. I am book marking this page and sending it to facebook. I have a 7 year-old grandson and his close friend and cousin is 6. Both he and she and their mothers will love it. Thank you.
Thanks Patricia! I hope your grandson and his cousin have a blast painting themselves a pillow case sometime soon, so that they may dream in techni-colour.