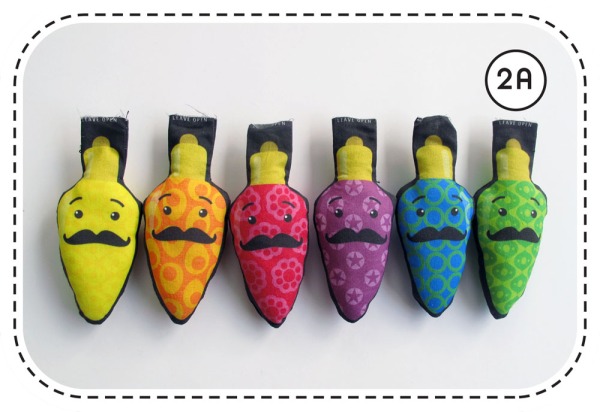
Señor Party Lights Tutorial: Movember here we come!
Señor Party Lights placed 5th in the Spoonflower contest. That’s reason to celebrate with some lights I’d say. Thanks to everyone who voted. If you ordered some of this fabric, here is the tutorial on how to sew them up. If you would like to order some of this fabric, you can find it either here in my Etsy shop or in my Spoonflower shop.
For this project you will need a swatch, a fatquarter or yardage of Happy Sew Lucky Señor Party Lights fabric. The amount of fabric just depends on how many “lights” you want. A swatch size will make either 2 double sided ornaments, or use your scraps as backing and get 4 lights. A fat quarter will get you a una gran fiesta = 14 double sided lights. (Or 28 one-sided by using your scraps as backing.) If you’re feeling super festive then a yard will be un partido muy grande = 56 double-sided lights. (112 with your own fabric used for backing.)
You will also need the following. Note that the cord is the kind you find in a haberdashery store, not the electrical type. These are enviro friendly lights, and use no power to operate and will never burn out! True, you can’t see them in the dark, but hey, look how cute they are with the lights on! If you are making single lights to hang as ornaments, then ribbon would perhaps be a better choice.
Seam allowance = 1/4″ (6mm)
Backstitch at start and finish of all seams.
Sew at a slow speed when going around curves. It makes accuracy much easier.
STEP 1: CUTTING & SEWING
a) Press your fabric. Cut all the lights pattern pieces out. I used a Fat Quarter of fabric, so this is what 28 moustached party lights look like = fun times.
b) Using a pencil or fabric marker, transfer the small dot markings onto the wrong side of the fabric. You don’t have to write all the letters on too – as long as you understand the instructions in point 1 (c), it’s pretty straight forward. Match up each light with markings on, with a side that has no markings.
c) Place your pairs of lights Right Sides together. Stitch from A to B, C to D and E to F. Leave gaps in between B and C, and between points D and E. (These will be to thread your cord through later)
1 d) Snip the inner corners and notch the curves. If you have pinking shears they’ll makes notching the curves a doddle.
1 e) Now you need to turn your moustached friends right side out. The easiest way to do this is with a fat straw and a stick. My favourites are the gerber straws from florists, but bubble tea straws work well too. Put the straw inside the sewn piece between A and F at the top. The poke your stick inside the straw from the outside, pushing the tip of the fabric into the straw. Once you have a nice dent you can remove the straw and finish up with just the stick.
1 f) Press all your little manly friends so that they’re lookin’ smooth.
2 STUFF ‘EM & HANG ‘EM!:
a) OK I love this part. Stuff the handsome muchachos till they’re nice and plump. Leave 3/4 ” (about 9mm) from the top cut edge free of stuffing.
2 b) Fold the 1/4″ (6mm) seam allowances inwards and press.
2 c) Now stitch up the openings. My preference is by hand because it’s more invisible than the line of machine stitching. These are pretty small gaps to sew, so hand stitching will not be that much more work, and will look better. (If you’re not in a hurry to have these done now, then pop them in a ziplock bag with your needle and thread and wait till you have a show to watch on TV, or a kid in a music lesson to wait for, then bring them out to keep your hands busy. I always have a bag of handwork ready to go, and am always amazed how much I get done while sitting at my son’s flute lessons.)
2 d) Tape the end of your cable to the skewer. Whoops, forgot to list tape as a “you will need” item. But I think we all have at least one roll of tape stashed somewhere. I think I have about 5 since my kids seem to go through it like water.
2 e) Use your chopstick to clear the pathway from the hole on one side of each light to the other. You will just need to poke down any obstinate bits of stuffing and work your way around the seam allowance at the other side. This will make a nice clear route for your threading of the cord.
2 f) Now we’re all set to string these boys up. Decide which order you’d like your lights to line up in – I went for rainbow because I am a ROYBIGIV freak. Love the rainbow! OK, now arm yourself with threading skewer and cord in one hand and first light in the other. This threading trick will work easily whether you are making individual light ornaments with ribbon or a long string of lights with cord. Poke your skewer (with the cord attached) through the clear pathway you made. Once it;s through move on to the next light. Don’t worry about spacing them out for now. Once you have them all on the cord you can space them out. If you are making a single ornament then make a loop about 3″ (8cm) long and tie a knot at the end.
If you are concerned about the lights moving around on the cord, are sure about where you want them, and don’t plan on ever moving them you can put a small stitch in one side to secure the light to the cable. But since you will hang these up then likely not touch them till you take them down, I don’t think that securing them to the cord is necessary. If they are free to slide along you can arrange them closer or further apart depending on the occasion and where you want to hang them. Since these party lights are perfect for any festivity, you may hang them on the Christmas tree in December, and on the deck railings when you throw a Mexican party in the summer. They’re good for birthday parties too. And if you’re having a Movember party then these are definitely the decoration for that occasion!
So mix up that punch, and party on, I say.


Hi Berene!!
Just wanted to let you know I’m very excited to meet you in person tomorrow night at the FVMQG meeting. It’ll be nice to put a face to the lady with the awesome kitchen!! BTW – We’re having a FQ swap – Christmas themed. If you want to participate, bring 4 in a ziploc bag.
Hi Eryn
It’ll be good to meet you too. I don’t think I have any Christmas fabric but will see what I can find. You never know what you might fish out if you dig deep enough! 🙂
See you tomorrow night.
Berene