HSL Tinies Gift Tag templates & tutorial
Hi again friends!
As promised in my previous post here is tutorial for making reusable fabric gift tags with HSL Tinies blocks. The tags were designed to be a sweet add-on for reusable fabric gift bags. Check out the cute samples using In Color Order’s pattern below. They can also be used as-is for festive ornaments. Have fun stitching a few up!
The free HSL Tinies Gift Tag TEMPLATES can be download HERE.
The INSTRUCTIONS on how to make the gift tags can be found in this step-by-step Youtube video HERE.
The HSL Tinies PATTERNS can be found HERE.
The Lined Drawstring Gift Bag pattern is by Jeni Baker / In Color Order and can be found HERE.


HSL Tinies: teeny little FPP blocks = huge cuteness!
Have you seen my new obsession with teeny tiny blocks on Instagram? They are a series of collections of tiny blocks each pack with a set theme – I call the series HSL Tinies, as in “Happy Sew Lucky Tinies”. They’re a great deal given that you get roughly a dozen or so patterns in each pack. Each block is a different size based on the amount of detail required and the proportions of the pieced image. The idea is that these are decorations for any small project such as small pouches, key fob strap, chopstick sleeve, coasters, zipper pull tags, guild name badge, quilt labels, pin cushions, needle book or gift cards. You can use just one block or combine them to create your own custom project. Lots of pics of adorable ideas shown below.
Read more…Women Life Freedom: supporting women in Iran
On September 16, 2022, a 22-year-old Kurdish Iranian woman named Mahsa (Zhina) Amini was killed by Iran’s morality police for wearing her hajib incorrectly. Her tragic death immediately catalyzed a wave of protests led by young women that has swept across Iran. With women at the forefront, the protests have unified Iranians across gender, ethnicity and religion in their united call for equality, democracy, and the downfall of the Islamic Republic. The recent wave of protests is part of a long struggle for freedom and equality that has spanned over 150 years and successive governments in Iran. The women’s movement in Iran is spreading to places where ordinary people live. It is giving a voice to women who have suffered for a very long time and have not had a voice in the past. Protesters face incredible personal risk – including police brutality and arrest/disappearance – and already hundreds of protesters, including dozens of children, have been killed. The women who lead this fight for their rights and for freedom for all of Iran have inspired the world in their absolute fearlessness and bravery. “Women! Life! Freedom!” now echoes through the streets of Iran, a slogan initially from in the Kurdish feminist movement (Jin Jiyan Azadi)

All woman deserve safety and freedom no matter where in the world they live. In all my life I have never had the need to question my freedom, yet many women in Iran have never know it. They have been controlled and oppressed for decades.
Read more…PEACE for Ukraine

Like so many around the world I have watched the news of what is unfolding in Ukraine, and, like many, I sit here feeling helpless as to what we can do about it. However, it occurred to me that while I obviously can’t change the course of events in any way, I could offer a tiny bit of support to Ukrainians around the world who must be feeling crushed, sad, terrified, worried and straight up furious. So I designed this little block to share with you in the hopes that quilters might make something beautiful with it and flood the internet with pictures of their support. It is a simple message: “мир” means “PEACE” in Ukrainian, and the word is imposed on the Ukrainian flag.

Hi friends and neighbours.
This project was designed in response to the tragic attack that occurred at the Lynn Valley Library in North Vancouver, BC, on March 27, 2021. A horrific event in which a young woman lost her life, and six others (5 of them woman) were injured, some with long term injuries. I’ve done a number of projects for other communities over the years. This one is personal to me as it took place a mile and a half from my home. These are my people.
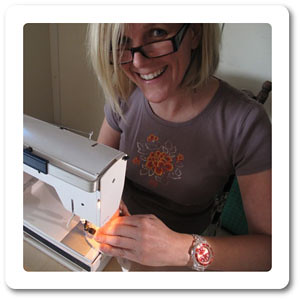
For those of you that have come here via links from the library and don’t know me, a brief introduction: I am a modern quilter, designer, instructor, speaker and community project organizer. My quilt designs and community work are somewhat intertwined. They may be about bringing people together to collaborate on a healing project, providing a platform to discuss social justice issues, a fundraiser for non-profit organizations to support marginalized communities, or sometimes they’re just about things that make me happy. Either way I love what I do and am so grateful to have found a way to use my skills to work with others to bring about change. You can see my latest escapades on Instagram at @happysewlucky.
Lynn Valley LOVE Project is my latest collective healing project, and you are invited to participate! You can do so by contributing a little creativity towards the collaborative installations.
There are two ways to participate:
1. LOVE BANNERS:
This will be an installation of a collection of banners with messages of LOVE and HOPE made by members of the quilting community. (Sewing level: Intermediate. Previous quilting experience is required. These banners will be pieced using quilting techniques. )
The banners will be a similar concept to my previous projects: #ToBostonWithLove and #TorontoLoveProject however note that the dimensions will be different. If you are a quilter and you or your guild would like to get involved, awesome! You can read all the details, project specs and requirements on this post here.
2. GIANT “LOVE” X-STITCH community engaged art project:
This is designed for the general community or anyone wishing to participate.
(Sewing level: EASY – no previous experience required.)
Contributors are asked to hand stitch a felt X onto a piece of white cotton fabric, using embroidery thread and a simple running stitch, with this downloadable pattern.
These are to be dropped off / mailed to the LYNN VALLEY LIBRARY by JUNE 15 at the latest.

The blocks will then be assembled into a large “LOVE” cross stitch design which will be installed in the library breezeway.

IMPORTANT: Please watch the following video tutorial for instructions on how to make these blocks.
Here is a list of locations where you can find supplies in Vancouver and online:
FELT:
Michaels – any location (Instore & curbside pick-up)
Dollar stores
Fabric Spark (order online)
EMBROIDERY FLOSS & NEEDLES:
Michaels – any location
Stitch and Bobbin (Owned by a Lynn Valley girl now living in Gibsons, order online for speedy shipping)
WHITE QUILTING COTTON:
(Note most online stores have a 1/2 yard minimum.)
Stitch and Bobbin (Owned by a Lynn Valley girl now located in Gibsons, order online for speedy shipping)
Dressew – 337 W Hastings St, Vancouver, BC
Spool of Thread – 101-649 E. 15th Ave Vancouver. (No in-store shopping. Order online for curb-side pick up)
Fabricana – 1348 United Blvd, Coquitlam, BC
FabricSpark – Toronto – order online
Mad About Patchwork – Ottawa – order online
Dinky Doo – #906 19055 Airport Way, Pitt Meadows, BC (No in-store shopping. Order online.)
DROP OFF / MAILING ADDRESS:
North Vancouver District Public Library
1277 Lynn Valley Road
North Vancouver, BC
Canada, V7J 0A2
Please write: “LYNN VALLEY LOVE PROJECT” on the back of mailed envelopes.
If you are in Vancouver: You can drop these off at the Lynn Valley Library Main main desk.
Library hours: Tues / Wed / Thurs 10am – 8pm, Fri / Sat / Sun 10am – 5pm, Monday – closed.
DEADLINE:
Blocks need to arrive at the Lynn Valley Library by: Wednesday, JULY 7, 2021.
Please include a note with your name, IG handle (if you have one) & location. We’d also love to know the story about why you contributed if you wish to share.
SHARE ON SOCIAL MEDIA: Post a pic on Instagram or Facebook. Tag #LynnValleyLoveProject
Thank you so much for participating!
Thank you also to the project partners. We have a brilliant band of team mates that are helping to pull these two installations off. I’m so grateful to them all for their skills. Much appreciated!

Lynn Valley LOVE banners

Hello quilty friends!
Thank you for joining me again. It’s been a little while since we made LOVE banners together, and these ones are for something close to my heart. On March 27 there was a tragic attack that occurred at the Lynn Valley Library in North Vancouver, BC, on March 27, 2021. A young woman lost her life, and six others (5 of them woman) were injured, some with long term injuries. I’ve done a number of projects for other communities over the years. This one is personal to me though as it took place a mile and a half from my home. These are my people.
The goal of the Lynn Valley LOVE Project is to bring healing and love into the space where this awful event occurred, and I am asking you to help me achieve this.
There will be two ways to participate:
1. GIANT X-STITCH: community engaged art project:
Designed for the general community / anyone wishing to participate. Skill level: Easy (no previous sewing experience needed. Video tutorial provided) See all the details of this option here.
2. LOVE BANNERS:
This will be a collection of banners with messages of LOVE and HOPE, that will be hung in the stairwell of the Lynn Valley library. It’s a 3-storey high space, with lots of beautiful light shining down into it, so a perfect spot for this inspirational installation. The banners will be made by members of the quilting community – both locally and afar.
This concept will be a similar to my previous projects: #ToBostonWithLove and #TorontoLoveProject however the dimensions will be 8″ wide with varied lengths from 8ft – 13ft. If you are a quilter and you or your guild would like to get involved, awesome! Please be sure to read through the project specs and requirements below.

What is required? I am asking guilds and individual quilters to get stitching and make us some double-sided banners, each customized with your interpretation of love, peace & hope. You could work on your own, or you could work with a friend and each make a side, and then stitch them together. The design is up to you: we encourage you to express your creativity in the design of your banner. Customize it with your interpretation of love, peace & hope. It can be a literal message or just a beautifully pieced banner that feels like love. (hearts, birds etc) The overall idea is to fill the space with beauty, comfort and love – like a big visual hug!
To ensure the installation looks cohesive, we have a few guidelines below.
Read more…Let the healing begin!
Today is a good day! I designed a pattern to celebrate.
May love, kindness, dignity and empathy always overcome prejudice, greed and hate. This pattern is a gift to you from your neighbour to the north.
May we always be friends and allies as we work together to make this world of ours a better place.

Please consider making a donation to one of the following organizations if you can:
https://warnockforgeorgia.com/
https://electjon.com/
https://fairfight.com/
TWO BLOCK SIZES: 14″ x 5″ and 7″ x 5″ (postcard size)
TECHNIQUE: Foundation Paper Piecing
LEVEL: Easy / Beginner
Important: This pattern is for PERSONAL USE ONLY. This pattern was designed by Berene Campbell to celebrate the election of Joe Biden for president. It is a free pattern and MAY NOT BE COPIED, REPRODUCED, REDISTRIBUTED OR SHARED FOR PROFIT IN ANY WAY. Items made with this pattern may not be sold for profit. Items may be sold to fundraise for the above organizations.
YOU MAY NOT REPOST it for download on another site.
© BERENE CAMPBELL Thank you!
Tag: #HEAL2020pattern
The Connected Project

A few months ago I was contacted by the NJMQG about doing a guild talk and possibly teaching a class by Zoom. New Jersey had really been through the ringer with COVID-19 and the guild was looking for a way for their members to connect during this time of isolation. Instead of a workshop, I came up with an idea for a group activity that their members could participate in safely from their homes, but that would remind them that they were each an integral part of a bigger picture.
Read more…The Happy Sew Lucky Big Easter Hunt! *free download*
Wow, are these crazy times or what? Let’s start by sending you all a big virtual (virus free😉) hug. I hope that you are all doing a first class job of self-isolating yourselves – not just for you but especially for those who seniors or vulnerable. If you aren’t isolating PLEASE START RIGHT NOW!
Alright, let’s talk about how it feels to be trapped together in close quarters. Noisy, smelly, squishy, annoying, restless… I could go on, but let’s also think about the positives: Many people are getting stuff done that they have been putting off for years, spending more time with their families baking, crafting, gardening, walking in nature together. My husband made a plastic dome cover for our one raised bed so that my daughter and I could plant our veggie garden much earlier this year. It was our attempt at being more self-sustaining through the Corona months, however we have since had both snow and an insane hailstorm so fingers crossed my little peas and radishes that have sprouted will survive.
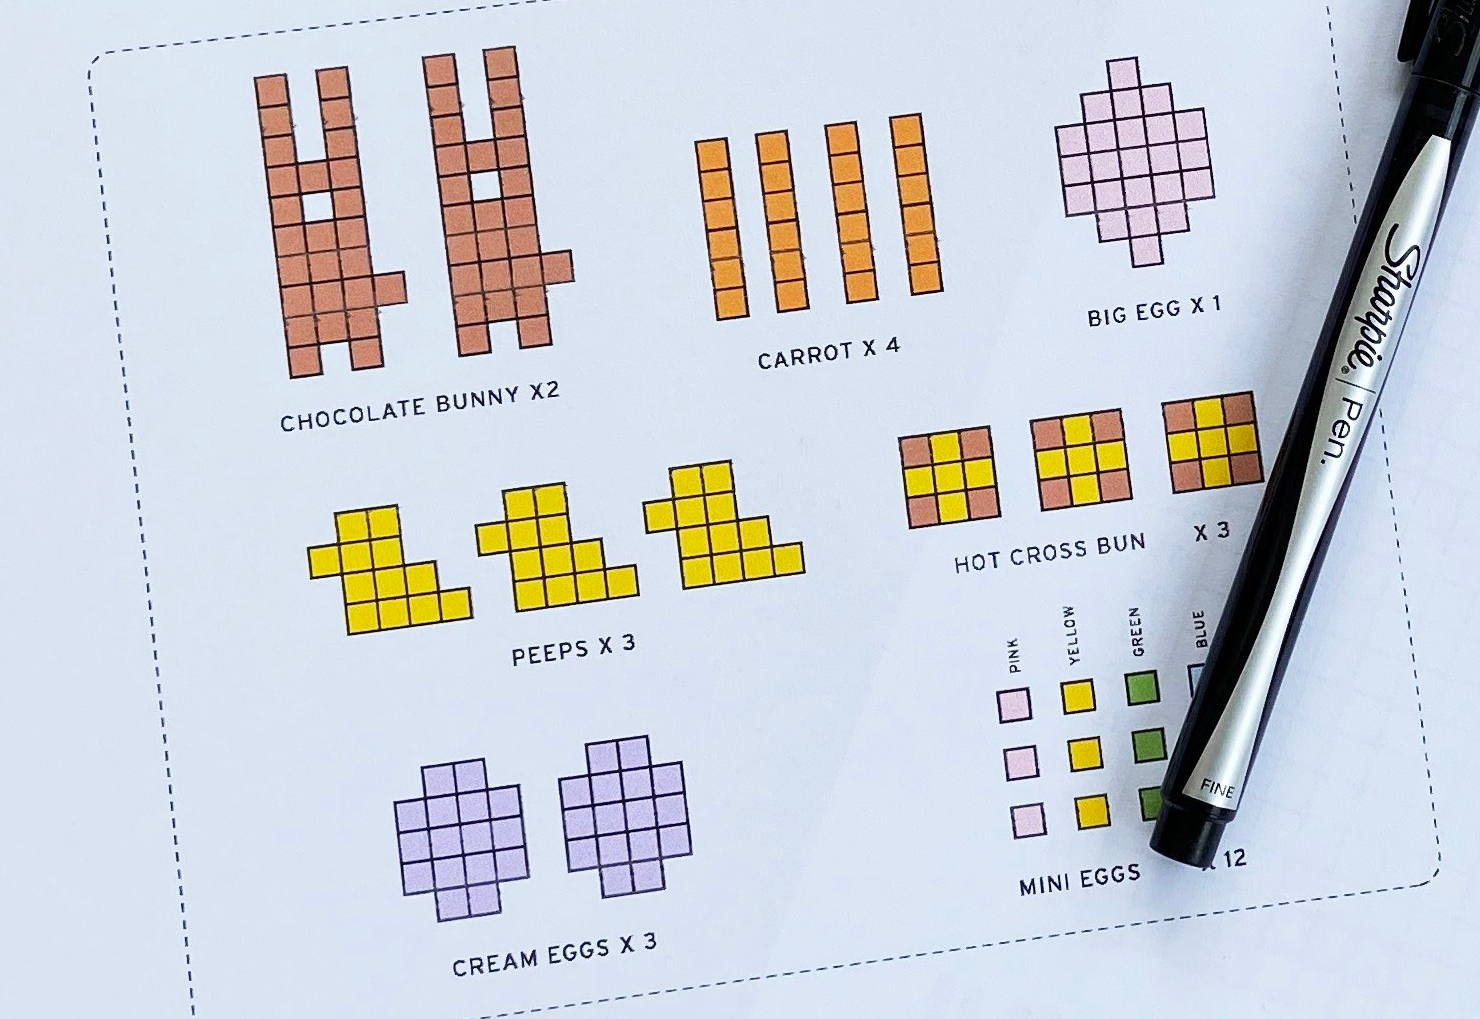
By now you are all likely feeling a little restless – I think we all are, but the scientists & experts say that we have a long way to go still, so we need to try to be calm, kind and patient. With Easter just a week away, it got me thinking about how this year will be different for sure, and sad for many that can’t come together to celebrate. But it is also a special time for families with many sweet rituals that we can still do, like decorating eggs, baking hot cross buns, and best of all the Big Easter Hunt. My favourite easter tradition is the big hunt for treats in the garden. Every year my mum would forget where she hid them all so we’d usually find the odd shrivelled up egg months later when gardening. 😜 And one year we saw a squirrel grab an entire large chocolate bunny (you know the kind that each kid just gets one of!!) and run up a tree with it. My kids were devastated and I suspect that Mr.Squirrel didn’t feel very well after that!
In the interest of keeping kids entertained I have designed a little Battle Ships inspired Easter Egg hunt game. It is free to download here: HSL.BigEasterHunt
There are two versions:
A Junior Edition for the littlees:

And a more complex version for older kids:

Also a reminder about another free download Easter craft project that I designed many moons ago. A selection of paper decorations for your Easter morning eggs.
The free download can be found in my post from 2012 here: https://happysewlucky.wordpress.com/2012/04/05/crafty-egg-heads-free-downloadable-paper-craft/
Enjoy!


Stay safe & healthy! Be kind to each other. ❤️
LOVE BURST quilt pattern
 I released a new pattern last month. A simple little block but it packs a lot of punch. It’s called “LOVE BURST” and it just makes me happy. The PDF download comes in two sizes: 5″ and 10″, and can be found in my Etsy shop.
The sneaky thing about the pattern is that it is designed so that the two halves of the heart are both piece #1 on the Foundation Paper Piecing pattern templates. This makes impressive pattern matching when fussy cutting super easy peasy. A number of people commented on my Instagram post about my great fussy cutting skills in this block. Hah! We’ll keep it our little secret, ok? 😉

A couple of weeks after the pattern was listed, I was tagged in a post by Jennifer of NEEDLE Crafts + Studio with this pic of a set of drawers that she customized for her shop with the Love Burst block:

I mean seriously?? How brilliant is that?! Jennifer’s lovely shop is located in Beausejour, Manitoba, 30 minutes northeast of Winnipeg. They carry a variety of fabrics (mainly quilting cottons, but some linen and rayon too), notions, kits (cross-stitch, embroidery, wool felt) and also yarns and knitting / crocheting / rug hooking / needle punching tools.

The 12″ LOVE BURST block would make a great pillow or centre for a medallion quilt. I made a zippy pouch for a friend with mine. The pink pompom just makes it extra fabulous!

Then I made a sweet pincushion with my 5″ block. The pattern for the round pincushion is in the works too. Soon to be released!

Here is the inspiration story behind my LOVE BURST block design:
“LOVE comes in many forms. You may love your partner, your family, a sweet pet, a neighbour or dear friend. You can feel love for our beautiful planet Earth, your community, your country, your God or even for your own precious self. Love is not always easy. Sometimes it’s most important to practice when it is hardest and most painful. But is is an essential ingredient to being happy and peaceful. It’s always somewhere to be found if your heart is open. So if you need to find love just look around you and love on, my friends.”


 *10% off for today* (Etsy store only. Price already adjusted.) Inspiration behind this block: On August 6, 1945, #SadakoSasaki was exposed to radiation from the atomic bomb in Hiroshima. She")